
Quick start for MCP
Instructions for those who want to jump right in with Claude Desktop
These steps walk you through setting up the MCP in Claude Desktop, one of the easier installations. You can view more options for Claude and other AI assistants in our installation guide.
Claude Desktop MCP installation
Requirements
In addition to having the desktop application, you'll also need Node.js version 20 or later. This is needed to run the tools that connect Claude Desktop to MCP servers.
- Claude Desktop application installed (Download)
- Node.js 20+ (Download)
- Rebrandly API key - Go to your Rebrandly profile, click API, then New API key.
Installing the MCP server
-
Open Claude Desktop.
-
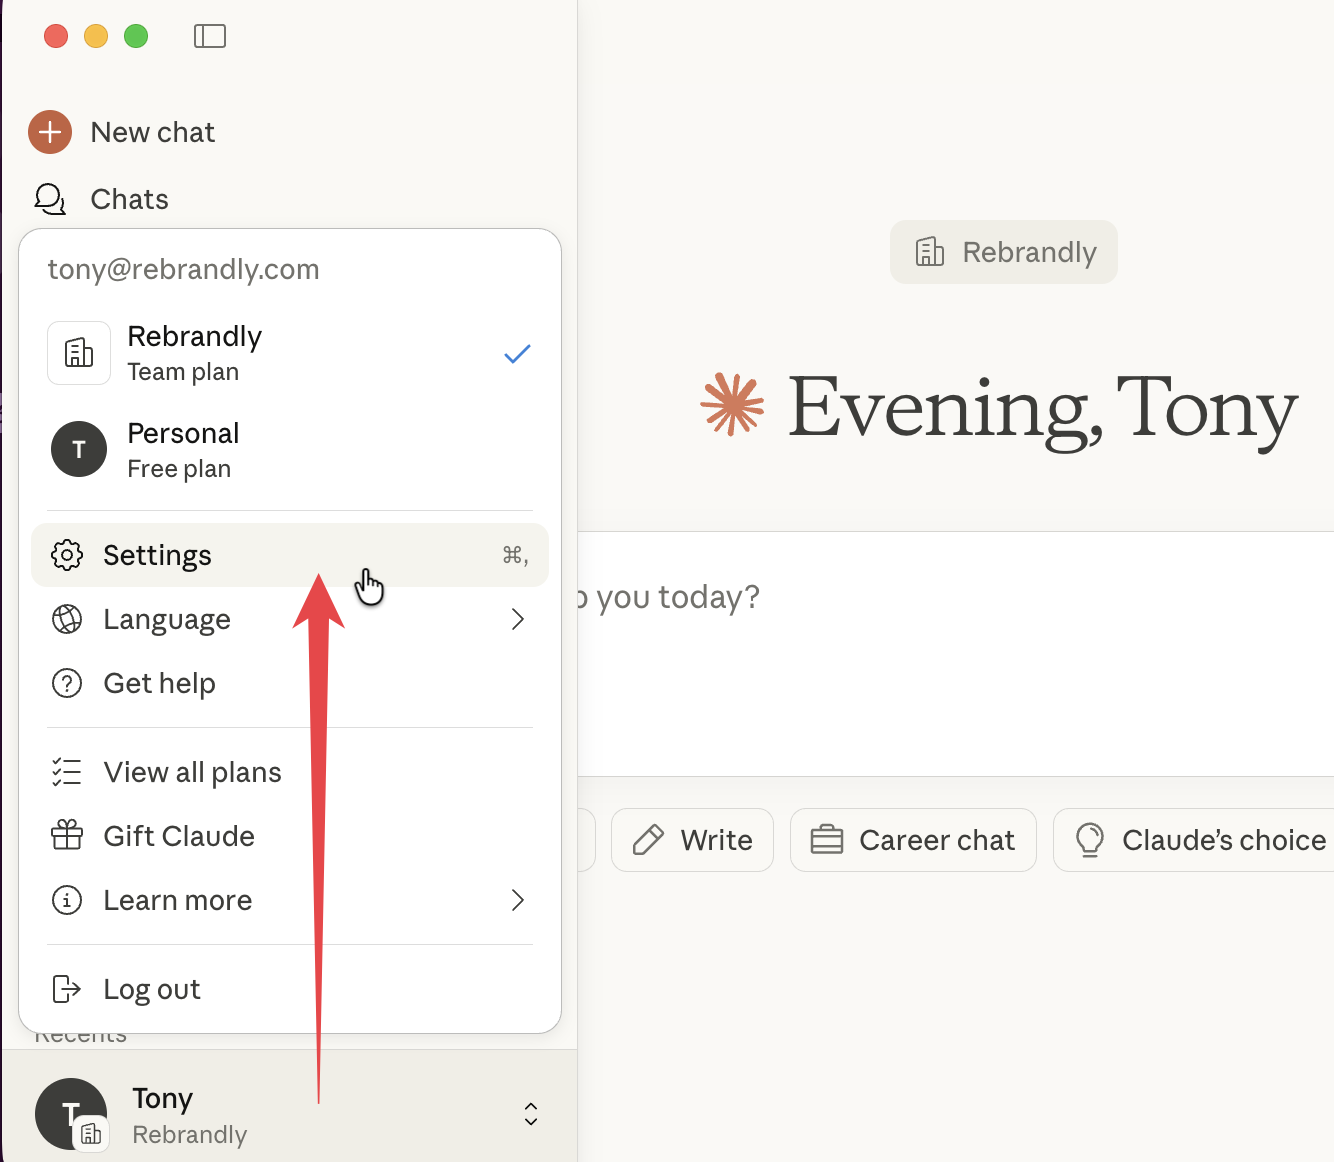
Click on your profile icon and then click Settings.
-
Click Developer and then Edit Config. This will open your file finder and select the configuration file—
claude_desktop_config.json.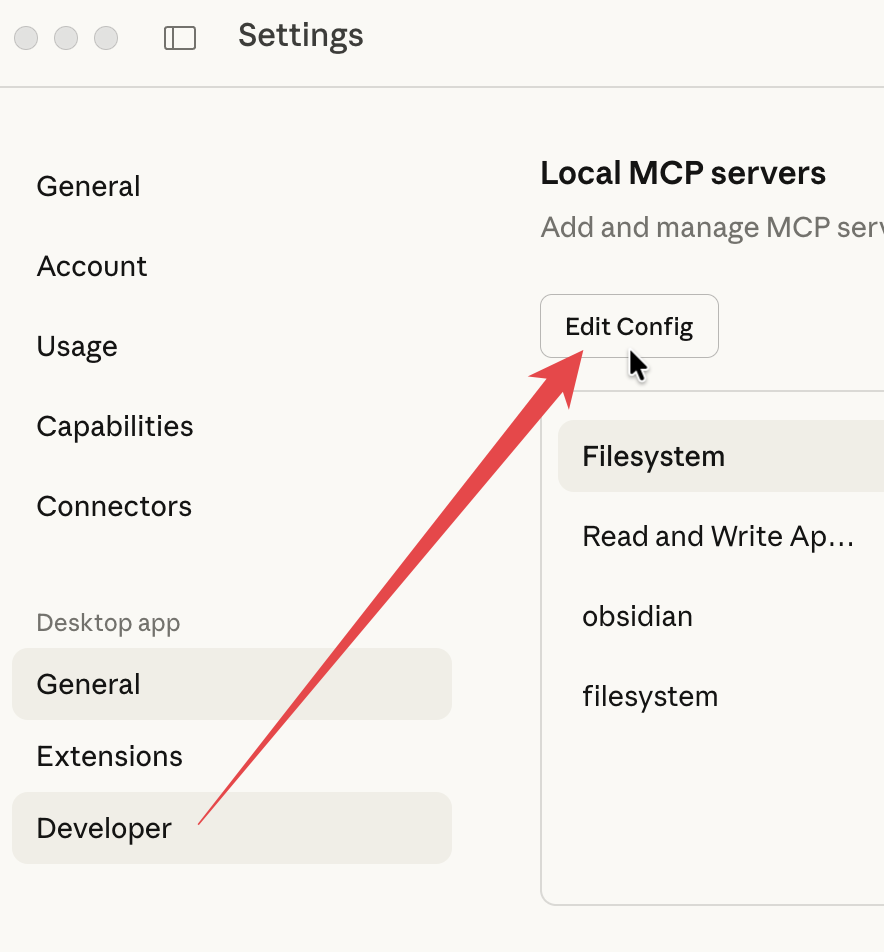
-
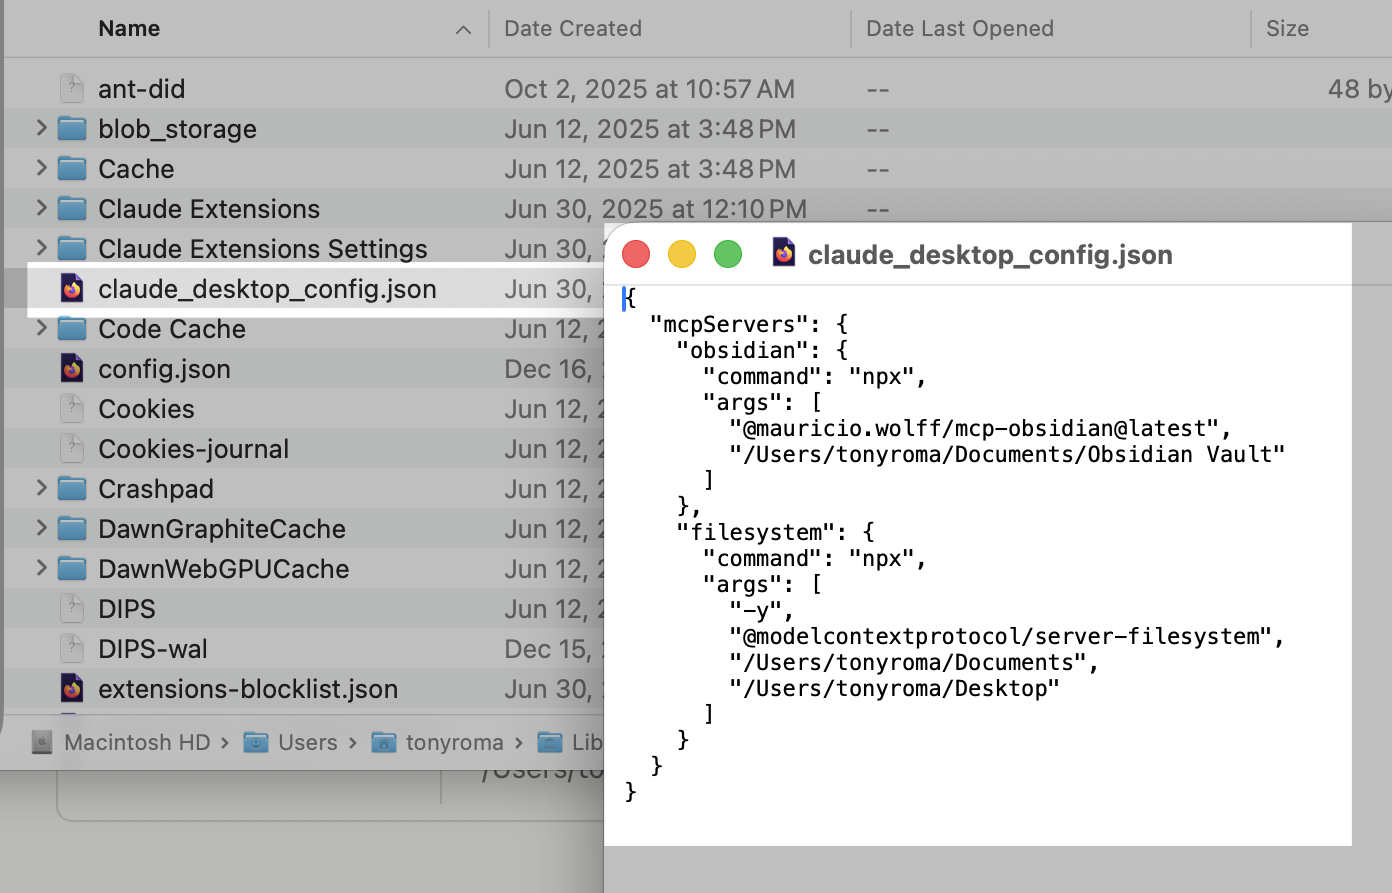
Open the file with a text or code editor.
-
Copy these lines and paste them into the configuration file. If you already have other MCP connections in the file, you'll need to insert these properly. If you're note sure how, we suggest asking Claude or another AI to help you.
{ "mcpServers": { "rebrandly": { "command": "npx", "args": [ "-y", "supergateway", "--streamableHttp", "https://mcp.rebrandly.com/v1/mcp", "--header", "REBRANDLY_API_KEY:YOUR_API_KEY" ] } } } -
Replace
YOUR_API_KEYwith the key you've created in Rebrandly. Note that there is no space before the key. -
Save the file. (Ctrl + S on Windows, Command (⌘) + S on MacOS.)
-
Close Claude Desktop and reopen it.
Now you're ready to use Claude Desktop to work with your Rebrandly links.
Usage examples
As you test, keep in mind that the actions you perform in the MCP are subject to the same permissions and limits you have in the Rebrandly app. For example, if your plan allows 10 links per month, links created in the MCP are counted toward that limit.
Create a branded link
"Create a short link for https://myblog.com/new-post with the slashtag 'blog-dec'"Get link analytics
"Show me click statistics for my link go.me/summer2026"Move links between workspaces
"Move all links tagged 'old-campaign' from my Personal workspace to Archive workspace"Bulk operations
"Create 5 short links for these URLs: [list of URLs]. Tag them all with 'newsletter' and use my mycompany.com domain."Available Tools
The Rebrandly MCP includes comprehensive tools for managing your account:
| Category | Tools |
|---|---|
| Links | Create, update, search, delete, move between workspaces |
| Analytics | Get metrics, device data, geographic breakdowns, reports |
| Workspaces | List, create, update, delete workspaces |
| Domains | View available domains by workspace |
| Account | View teammates, plans, subscription details |
| Developer help | Get API guidance and endpoint information |
Support
Use our chatbot in the lower right of this page to ask questions, note documentation issues, or contact us.
For API questions, see our API documentation.
Updated about 1 month ago